
How to Make a Horseshoe Boot Rack
Our good friends have three horses on their farm and spend quite a bit of time on equestrian activities. Their birthdays are very close to each other so we wanted to give them a unique combined gift this year. As I do a little welding, I decided to put together a horseshoe boot rack for their mudroom.
If you’d like to make a horseshoe boot rack for yourself or the horse lover in your life, here are the supplies, equipment, and instructions you need.
This post contains affiliate links, which means we may receive a commission (at no cost to you) if you purchase something we have recommended.
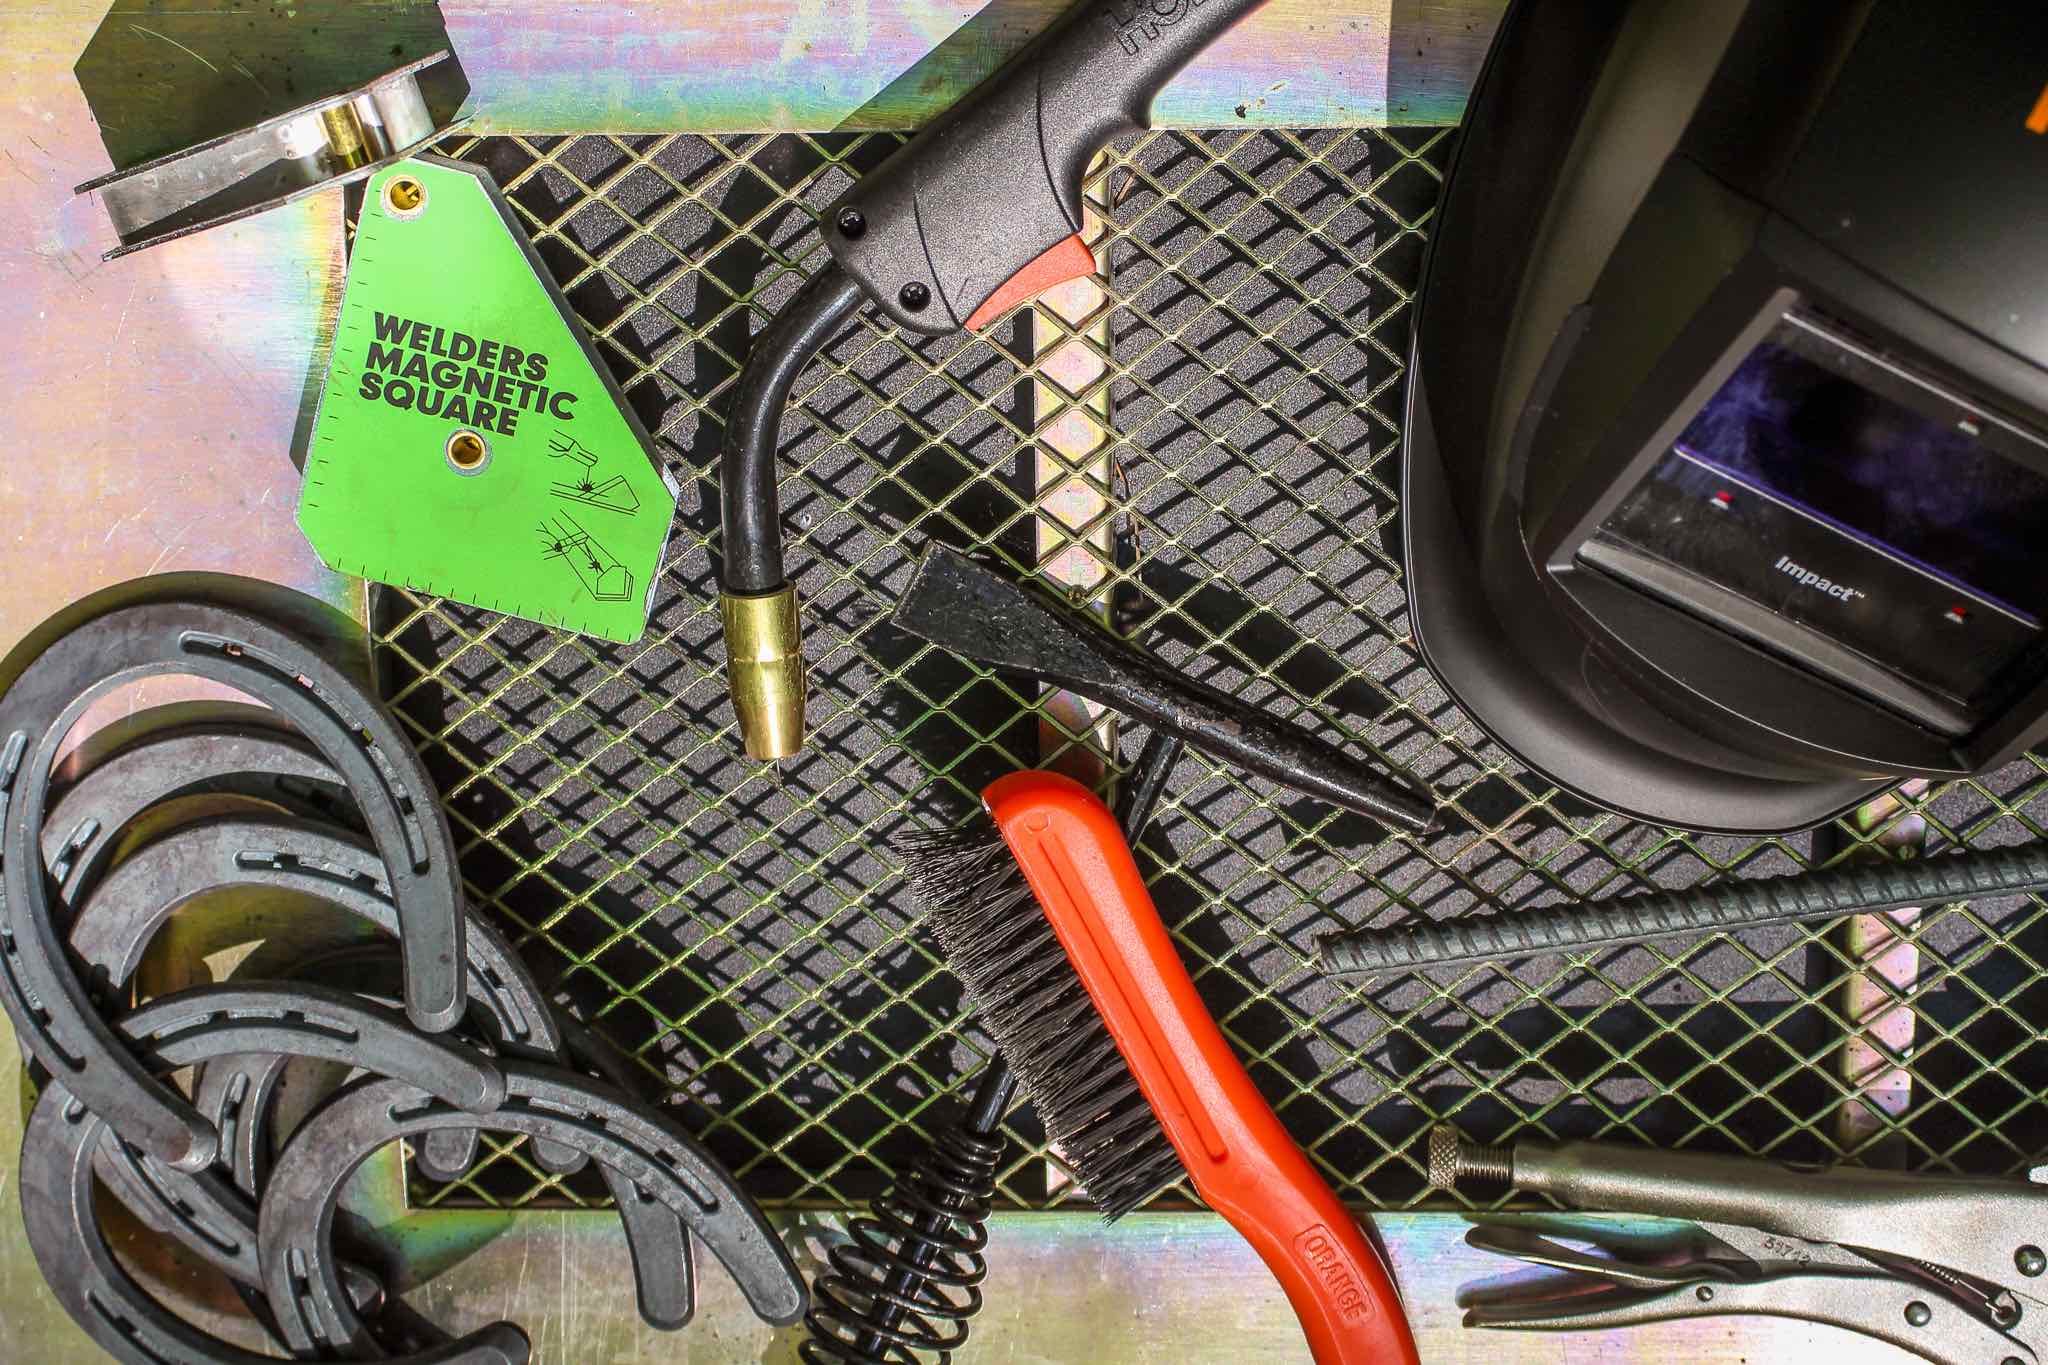
Supplies
- 12 horseshoes – I like to use St. Croix’s plain size 2 shoes. Unfortunately they only have smaller size shoes at our Tractor Supply Company and local farm supply stores, so I end up having to order online. You could also use used horseshoes if you have access to them, but they need to be thoroughly cleaned and rust-free before welding.
- 3-foot length of ½-inch rebar – This should be easy to find at Tractor Supply Company or most any hardware or home improvement store.
Equipment
- Wire welder – I use a Hobart Handler 140. I’m assuming if you have a welder you have all of the necessary equipment for it, such as a welding helmet and gloves, so I haven’t listed it out here.
- Welding table
- 3-foot long straight piece of scrap metal – I use a ¾-inch square tub of 16-gauge steel
- 2 6-inch locking metal c-clamps
- 2 welding angle magnets
- Metal grinder
- Welding hammer
- Wire brush
Instructions
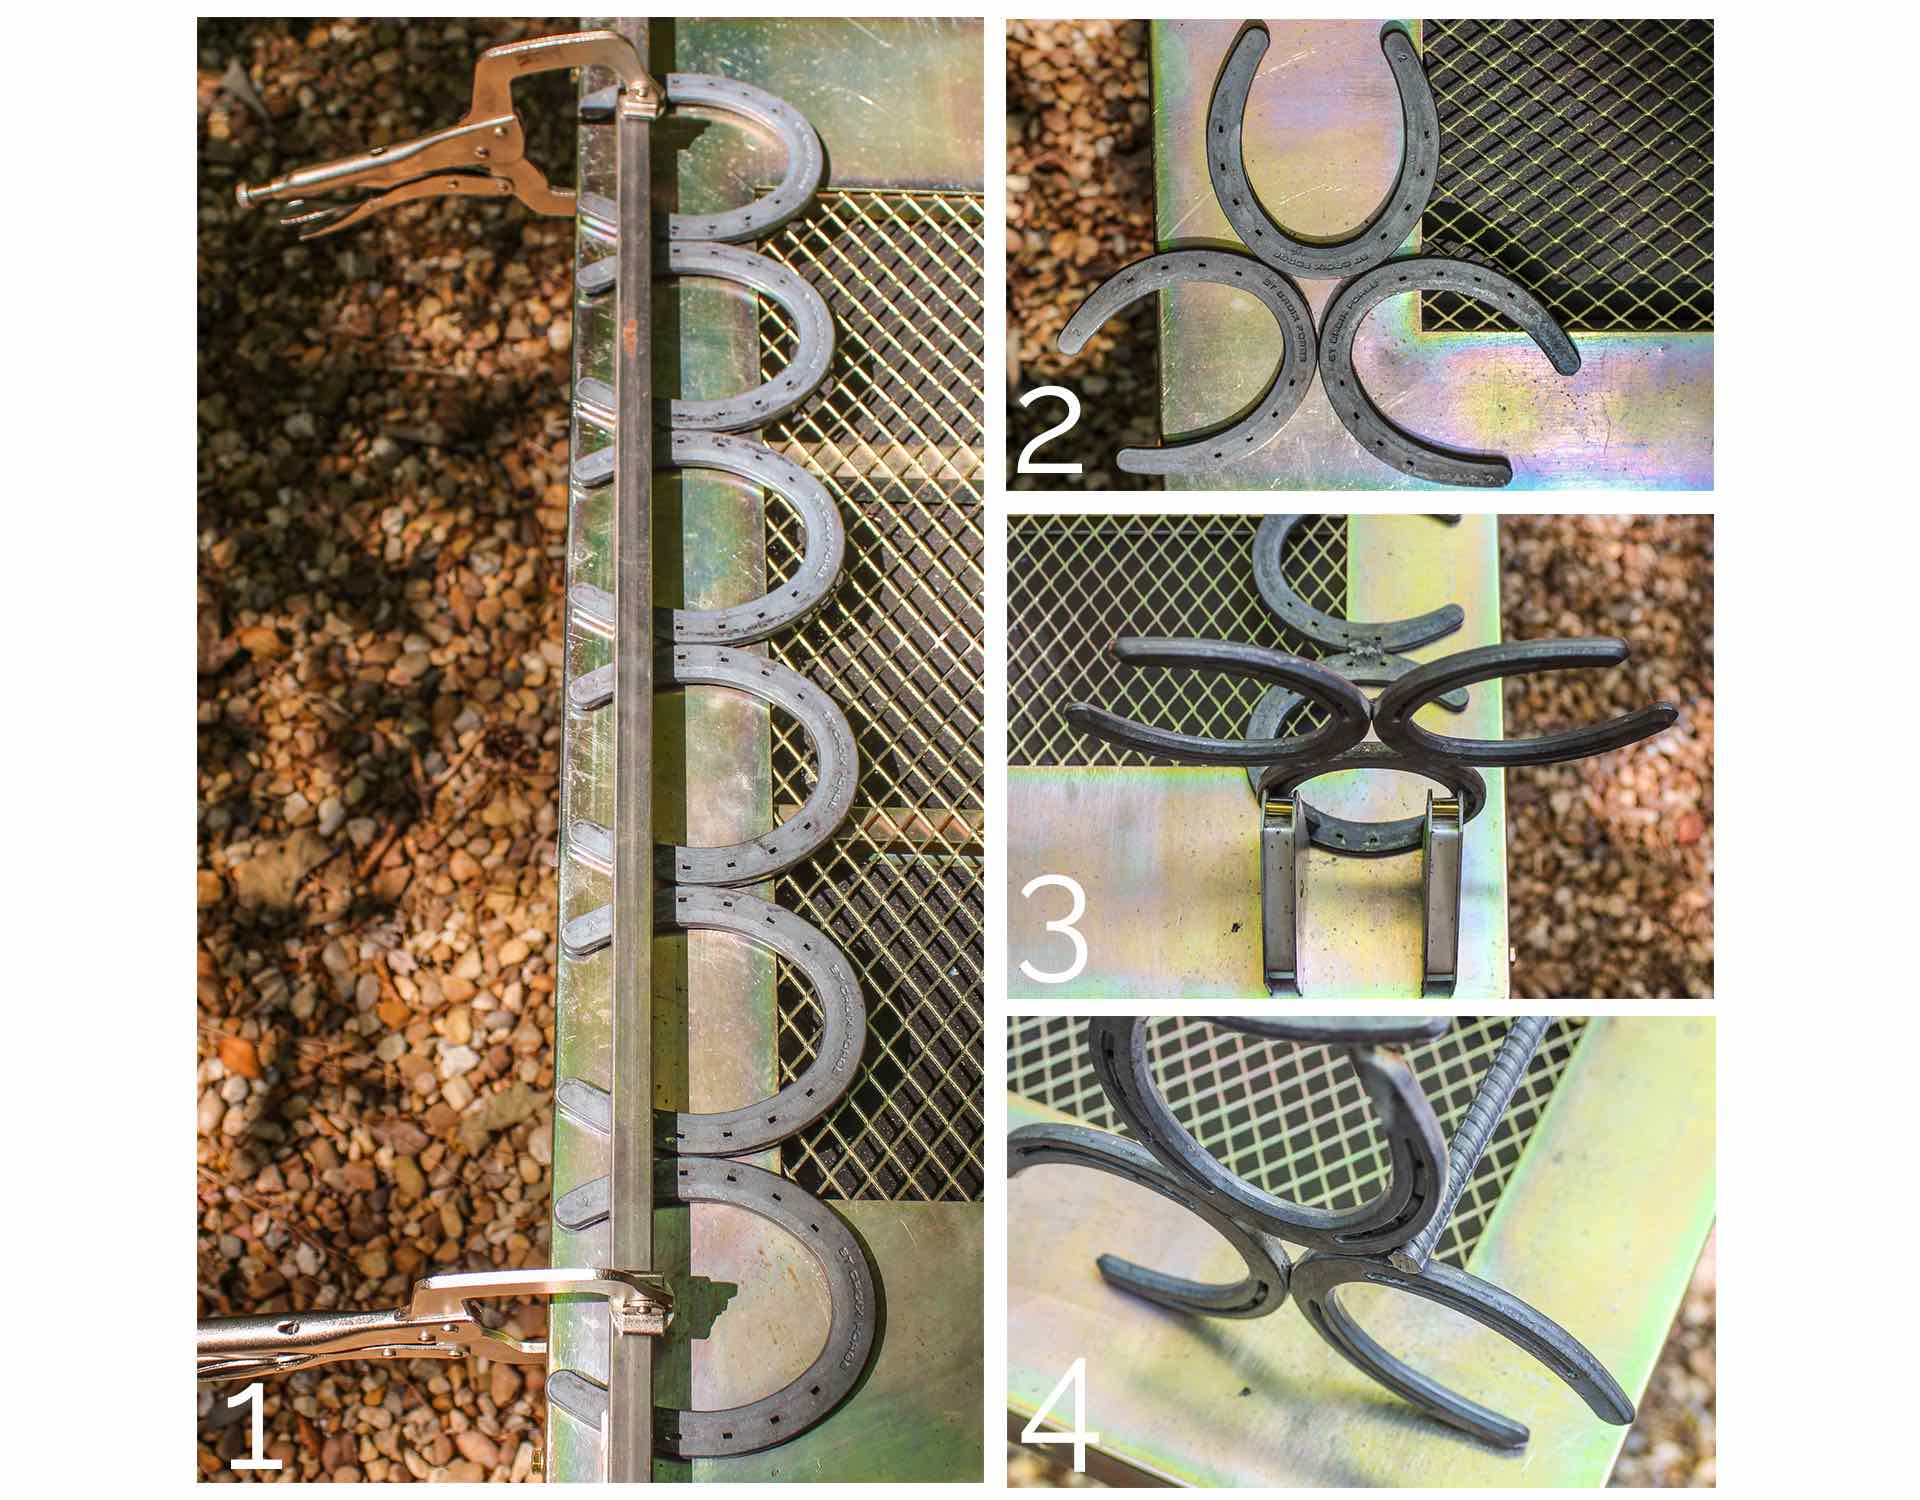
1. Start by putting together the top. Lay six horseshoes side by side, making sure they are upside down so you are welding on the bottom. Lay the metal bar across the bottom of the horseshoes and use the clamps to hold it in place at each end. This will ensure your top is nice and straight. Weld the horseshoes together at the five touchpoints, then remove the clamps and metal bar.
2. Next, put together one of the sides. Lay three horseshoes back to back, again making sure they are upside down, and weld together at the three touchpoints.
Repeat the process with your remaining three horseshoes for the second side.
Use the welding hammer to remove any flux from the welds on the top and sides.
3. Place one side at a right angle to the upside-down top with the front of the side facing out. Make sure that the opening of one of the side’s horseshoes is what is in contact with the top. Use an angle magnet to hold the two pieces in place and then weld the two touchpoints.
Repeat the process with the second side, then remove any flux from the welds with the welding hammer.
4. Flip the rack right side up and place the rebar at the point where the bottom front horseshoes on each side meet. Position the rebar flush with one side and mark the excess rebar on the opposite side. Cut off the excess with the metal grinder.
Place the rebar back on the rack and weld the touchpoints at each end.
Use the welding hammer to remove any remaining flux from the welds, then use the wire brush to shine everything up.


2 comments found